
Building a R2D2 Themed Bluetooth Speaker
March 30, 2017
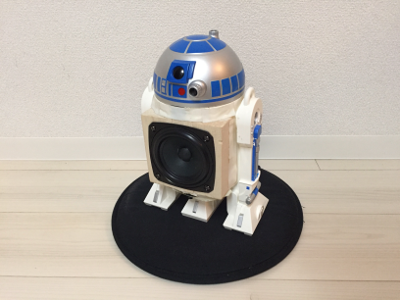
My girlfriend brought a R2D2 shaped popcorn bucket from Tokyo Disneyland the other day. Turns out that it’s pretty much useless, once the popcorn is gone… so I took my freedom to build something out of it. And all I needed were some tools and a Raspberry Pi 3.
I proudly present my R2D2 Bluetooth Speaker!
So how to build this thing?
The most important parts for building a speaker is the speaker unit itself and of course an amplifier. Luckily everything can be bought on the internet nowadays. I got a 10cm full range speaker unit from Amazon (~15$). And also the amp that was even cheaper (~4$).
Lets have a look at the schematics:

There is not much to explain here, its basically just soldering the parts and a few connectors together. Since the amp runs on 12V I needed to add a converter that steps down the input voltage for the Raspberry Pi which runs on 5V.
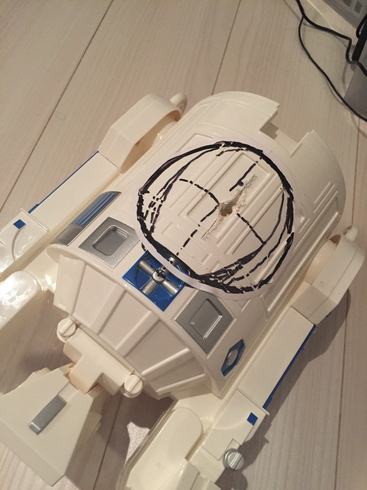
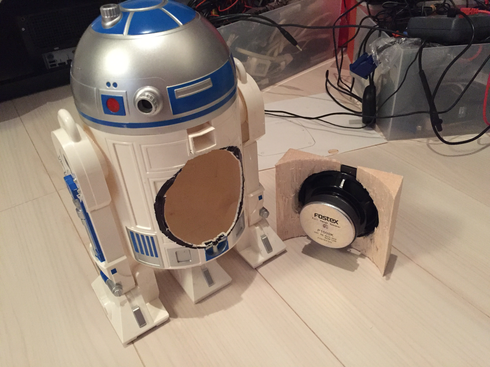
First of all, I gave R2D2 a surgery:
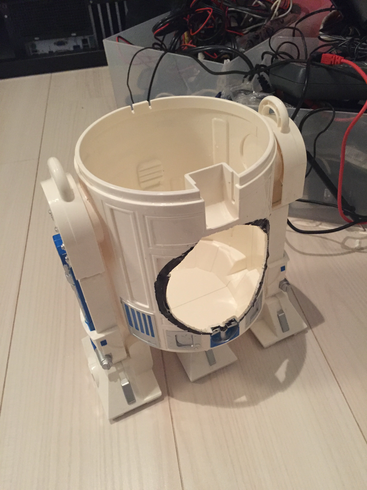
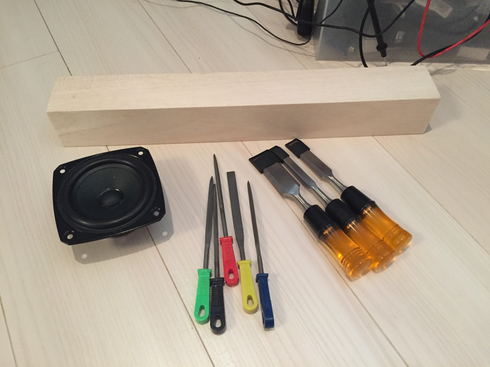
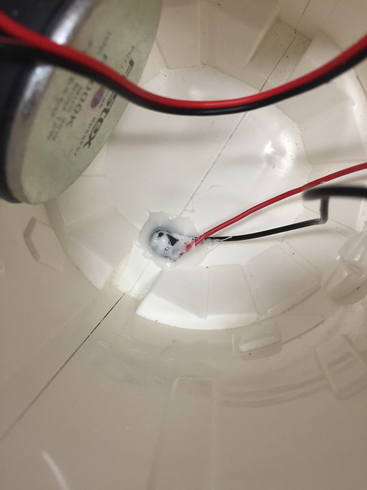
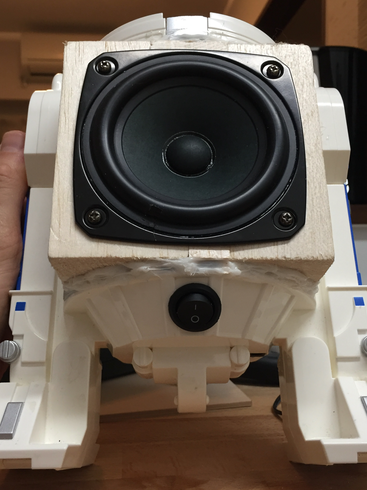
To connect the speaker unit with the bucket I got a block of balsa wood. Balsa is super easy to process. As you can see in the pictures below, I attached the speaker unit to the balsa and afterwards the whole thing to the bucket. I used some sharp screws that easily go through the plastic. Finally I filled the gaps with a glue gun. This is needed to prevent an acoustic short circuit.

I couldn’t wait, so I hooked up the amp with the speaker and my phone. Works great so far!

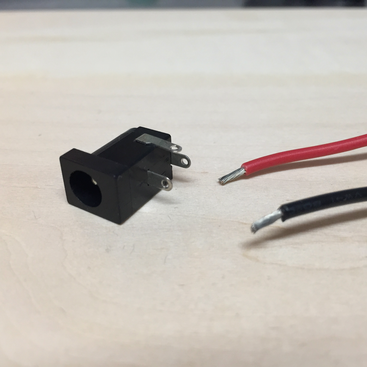
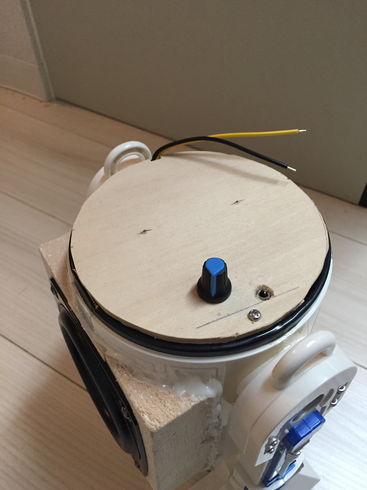
Open cables are not cool, so I have to tidy things up. I started with the power cables. The DC connector goes underneath R2D2.
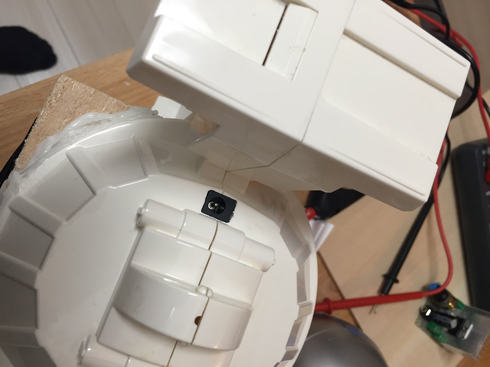
For a bit more comfort, R2D2 also gets a power switch.

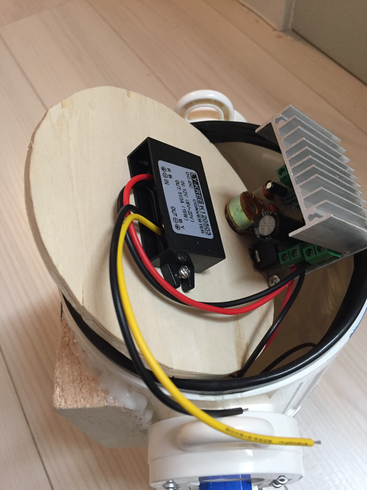
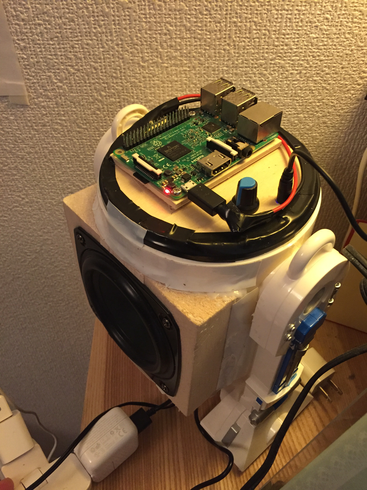
Next, I want to put the amp inside R2D2. I mounted it on a prepared piece of plywood that will cover the bucket. The DCDC converter is quite bulky and I want to hide it as well, so I also screwed it underneath the plate.
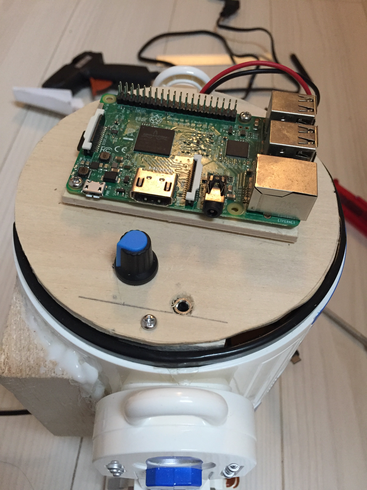
The Raspberry Pi will be mounted on the top of the plate. It is R2D2s brain! Once mounted, I just have to connect it to the 5V power source and the headphone jack with the amplifier.
The last task is to make the Raspberry Pi accept Bluetooth connections and output the music to the headphone jack. By using bt-speaker, a library that I wrote for this project, it can be done with a single command. I wrote a rather technical article about how it works here.
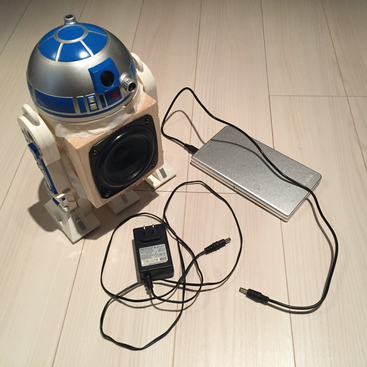
R2D2 is powered by 12V direct current. Luckily this is pretty common for small home electronics and I had an unused power adapter lying around. For outdoor parties I also bought him a battery. The battery lasts for around 10h at a pretty crazy volume.
As a gimmick, I also added some beeps when a device connects or disconnects from R2D2. Pretty cool.
OK thats it! I hope you had fun reading this article and start building your own R2D2 now!